We’ve redesigned the Contact Drawer to optimize your view and increase efficiency in accessing a Contact’s information. Here’s a rundown of the changes. 🎉
New Vertical Sidebar for Contact Drawer
Originally, Contact Details, Activity and Channels were displayed as tabs within a permanent panel. The tabs are now repositioned in a persistent vertical sidebar to the right of the Messages Module for easier navigation. Clicking on any of the tabs will open the Contact Drawer for a wider display of the relevant contact information.
New Tab: Merge Suggestions
Merge Suggestions was previously positioned at the bottom of the Channels section. There were no details provided about the Contact(s) with overlapping identifiers that prompted the merge suggestion.
For improved Contact management, Merge Suggestions now has its own tab in the Vertical Sidebar. When clicked on, it provides key information like overlapping identifiers about potential duplicate Contacts. This allows you to compare the details at a glance and decide if the merge suggestion is valid.
Repositioned Tags Field
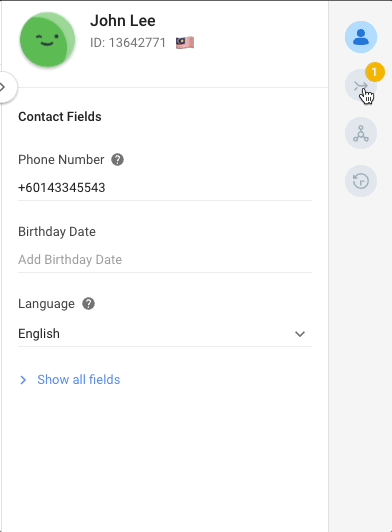
Previously, if you have numerous Contact Fields, you would have had to scroll all the way to the bottom of the Contact Details panel to view the Tags. This has been updated as a persistent section in the Contact Drawer so it will be pinned in position and is therefore always visible for easy reference.
Collapse the Contact Drawer
The new Contact Drawer is collapsible! Hover over the drawer and click on the arrow button to collapse it. This will expand the Messaging Console and allow you to focus on conversations.
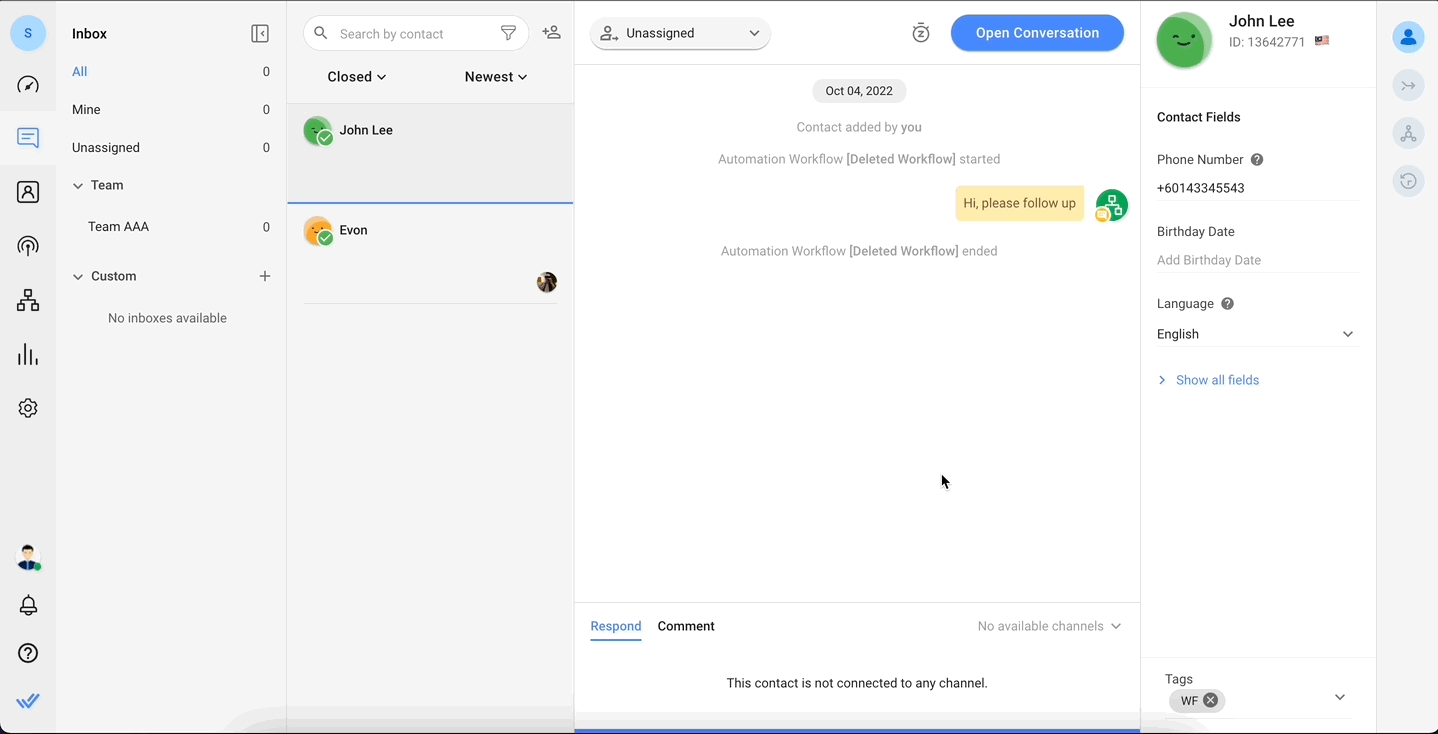
To reopen the Contact Drawer, simply click on any of the tabs in the Vertical Sidebar.
Customize Your Contact Details View
You can now customize your Contact Details view by reconfiguring the order and adjusting the visibility of the Contact Fields. This tailors the Contact Details to your specific use so the most relevant information is easily accessible and all secondary information or noise is concealed.
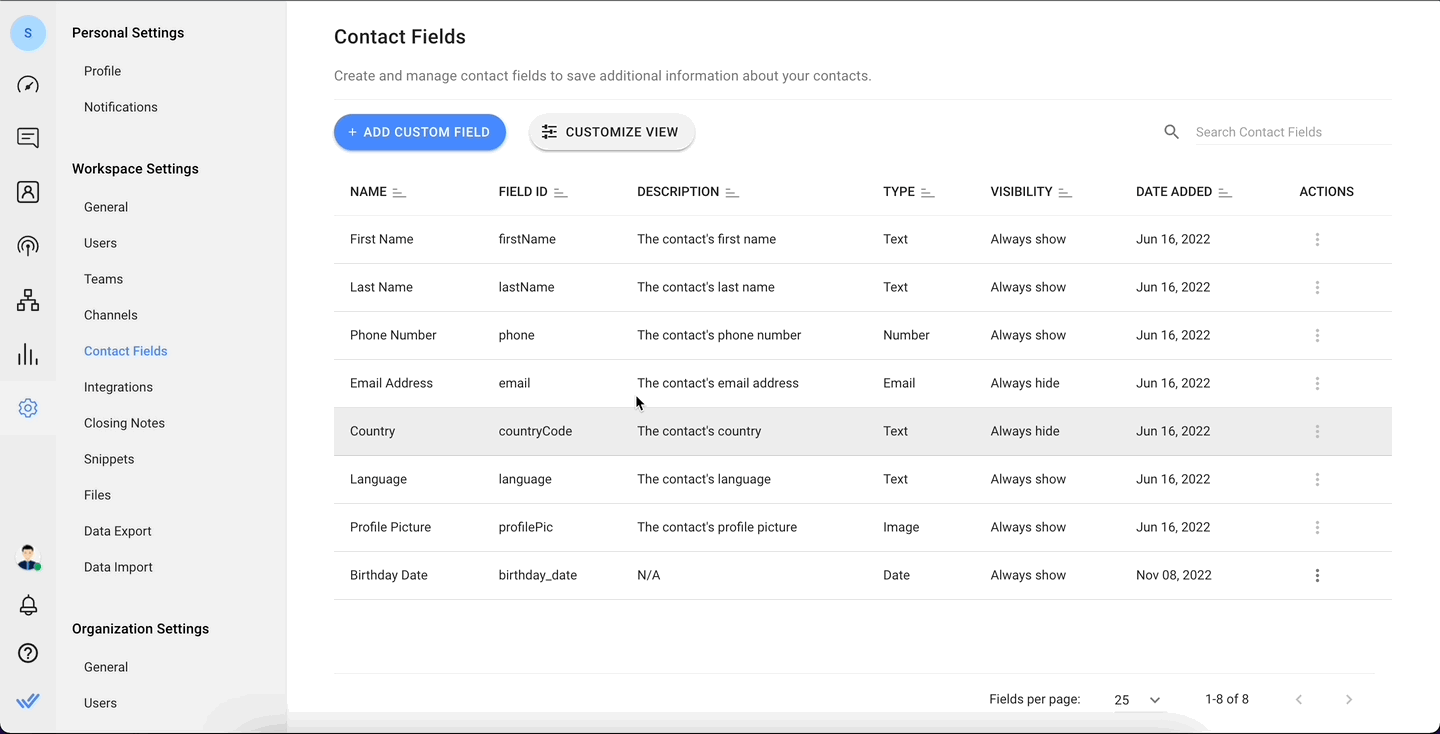
In Settings > Workspace Settings > Contact Fields, click the Customize View button. Now you can reorder the fields or edit their visibility.
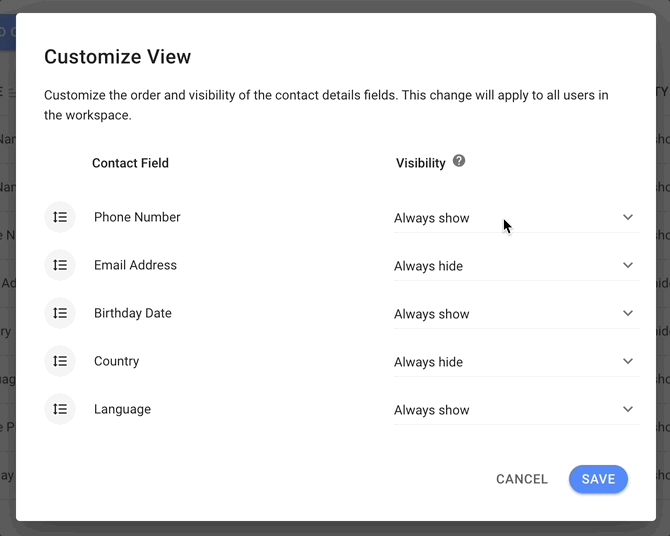
To reorder the fields in the Contact Details Drawer, drag and move them in the dialog to your desired order. Click the Save button when you’re done. The new arrangement will be reflected in the Contact Details Drawer for all Workspace Users immediately.
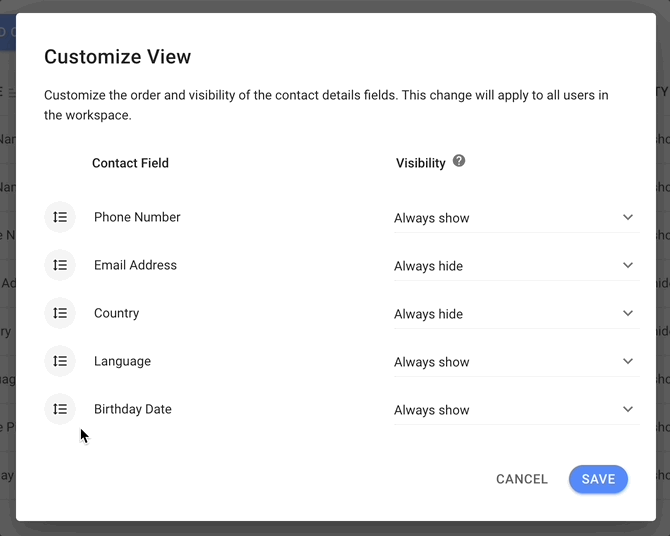
To display only relevant Contact Fields, you can manage the visibility of individual fields.
There are 3 options for Contact Fields visibility:
- Always show: When this option is selected, the Contact Field will be displayed in the Contact Details Drawer.
- Always hide: When this option is selected, the Contact Field will be hidden in the Contact Details Drawer.
- Hide when empty: When this option is selected, the Contact Field will be hidden if its value is empty.
Once the changes are saved, the new visibility configuration will be reflected in the Contact Details Drawer for all Workspace users.
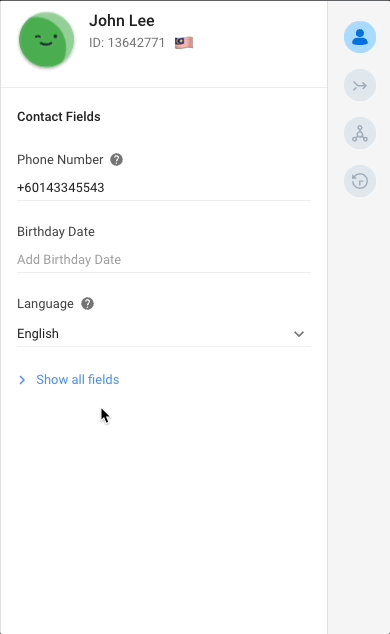
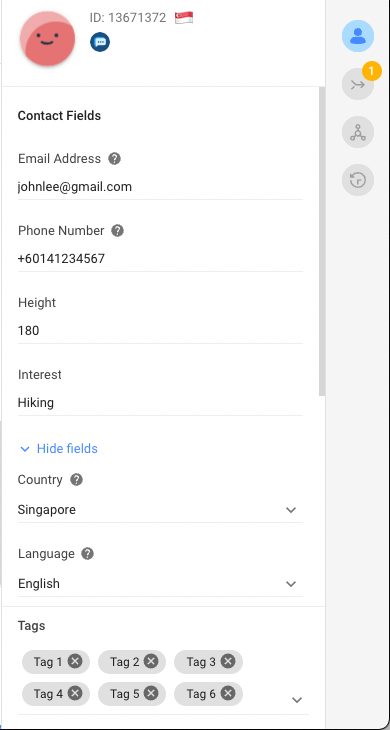
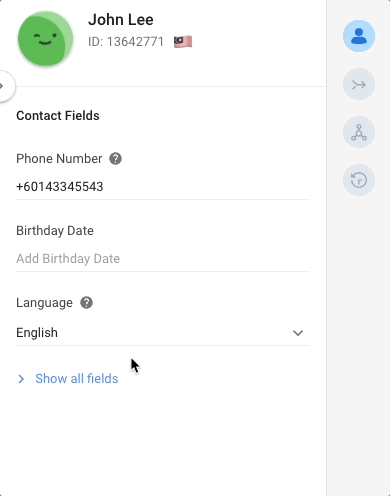
To view all hidden Contact Fields, click on the Show all fields toggle in the drawer. You can hide them again by clicking on the Hide fields toggle.
Description Tooltip for Your Contact Fields
You can show a Contact Field’s description in a tooltip in the Contact Details Drawer. This will provide users such as new agents information on the use and intended value types for this field.
To create a description tooltip, go to Settings > Workspace Settings > Contact Fields and add a description to the relevant field. Click Update when done. The description tooltip will be shown in the Contact Details Drawer for all Workspace Users immediately.